
I spend most of my programming time writing C++. And like many other C++ programmers, I’ve shot myself in the foot countless times with a feature I didn’t fully grok. And I’ve spent enormous amounts of time trying to understand the language. Like many other C++ developers in this position, I find myself frequently daydreaming about switching to another more modern and easily understood language.
The two languages that I spent most of my time daydreaming about writing code in are Rust and Zig.
Rust, because of its focus on safety and performance. The language effectively tries to prevent you from shooting yourself in the foot. The language has been designed with more care than C++ – features are tested for feasibility in a nightly branch before being released. A few promising graphics libraries, like gfx-rs, make the language very appealing. But on the other hand, the language has a steep learning curve. Additionally, some of the community discussion gives me little hope that the language is going to stop growing anytime soon. At this time, there are already two slightly different ways of using modules.
Zig, because of its focus on robustness and clarity. The language aims to be easily readable and understandable. The language also features a very elegant take on metaprogramming and generics, far nicer to use than what you currently get in C++. But on the other hand, the language lacks lots of features, like operator overloading, interfaces, and traits.
Would the lack of features in Zig make me more or less productive than with Rust’s feature overload? Which language is more enjoyable to use for writing a small, self-contained computer graphics project?
To find out, I decided to implement the same simple project in both languages: a small ray tracer, following the book Ray Tracing in One Weekend. Briefly put, ray tracing is a computer graphics algorithm in which light is simulated by shooting a bunch of rays from the camera into the scene and tracking the path the rays take as they interact with the scene. The book’s code samples are C++, but the code is not complex and lends itself well to being reimplemented in other languages. Here’s how it went.
Rendering the first pixels
To kick the project off, a way to display images is required. I wanted to render the image directly to an open window, instead of outputting the image to an image file, like the book does. So, to start this project off, I had to open a window and display some colored pixels on the screen.
![]()
The goal of this section: open a small window and add some colors to the pixel buffer.
Rust
In the C/C++ ecosystem, I’m most familiar with using the SDL media library for providing a window to use for rendering. Of course, you can use SDL in Rust as well. But Rusts’s main package registry, crates.io, actually had something better: the minifb crate (crates are Rust parlance for packages). It does one thing well – it lets you open a window and set its pixel buffer. No complex setup required, perfect!
Adding the crate was as easy as adding one line to Cargo.toml.
[dependencies]
minifb = "0.11.2"
The crate was automatically downloaded and compiled in the background the next time the build was executed.
I have to say the discoverability of packages is really nice on websites like crates.io and especially lib.rs. While many packages are not mature, it is nice to see what people have worked on in one place. If you want to find a C++ library, you most likely have to scrape through sourceforge, only to find something written during the last millenia using completely different style and standards than you are.
Zig
Zig is a very new language in comparison to Rust. That means no convenient packages to get you started. But Zig has something else up its sleeve: C headers can be imported into the current Zig module using @cInclude("SDL.h") allowing you to use the C functions, structs, and even macro values directly in the Zig code. This made introducing SDL into the project fairly painless.
Zig actually goes a step further, because the Zig compiler is also a C compiler. I wrote a small C function to set pixel values in the window surface in C, and the C source file could be compiled alongside the Zig source, with the following small addition to the build.zig file, which tells the Zig compiler how your project should be built.
// Add Zig source to the ray tracer executable
const exe = b.addExecutable("zig-tracer", "src/main.zig");
exe.setBuildMode(b.standardReleaseOptions());

// Add the C source file to the executable
exe.addCSourceFile("src/pixel.c", lib_cflags);
exe.addIncludeDir("src/");
exe.linkSystemLibrary("c");
This allows Zig to easily coexist alongside C source code.
Implementing the ray tracer
Rendering images in the ray tracing book involves writing definitions for ray-sphere collision testing as well as writing definitions for how the ray interacts with the surface of a sphere once it collides.
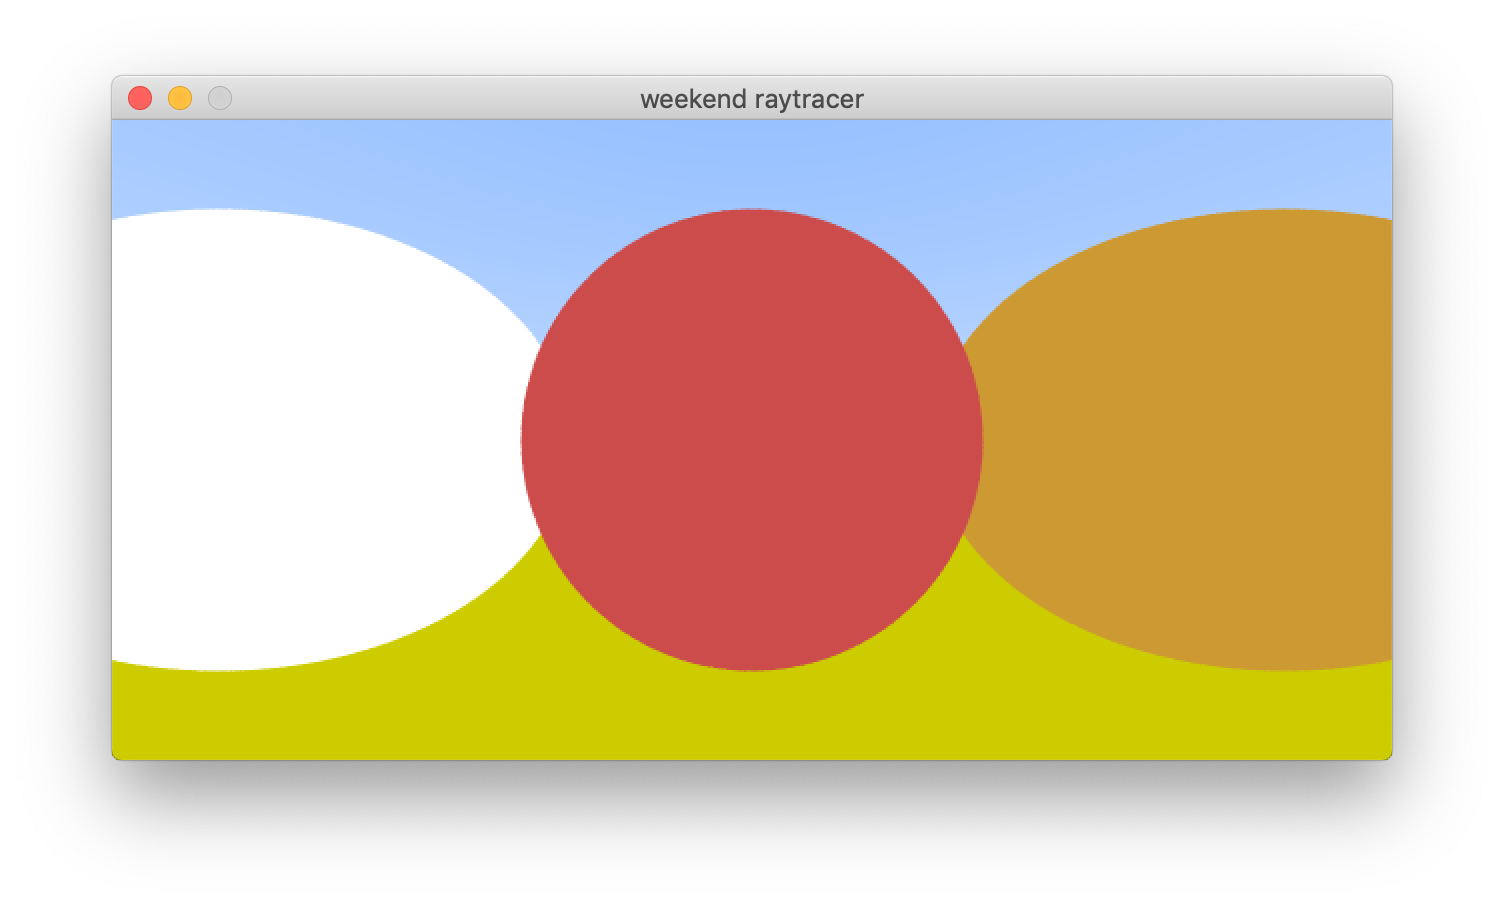
Testing whether my ray-sphere collision tests work: the scene rendered using just the color value of the object.
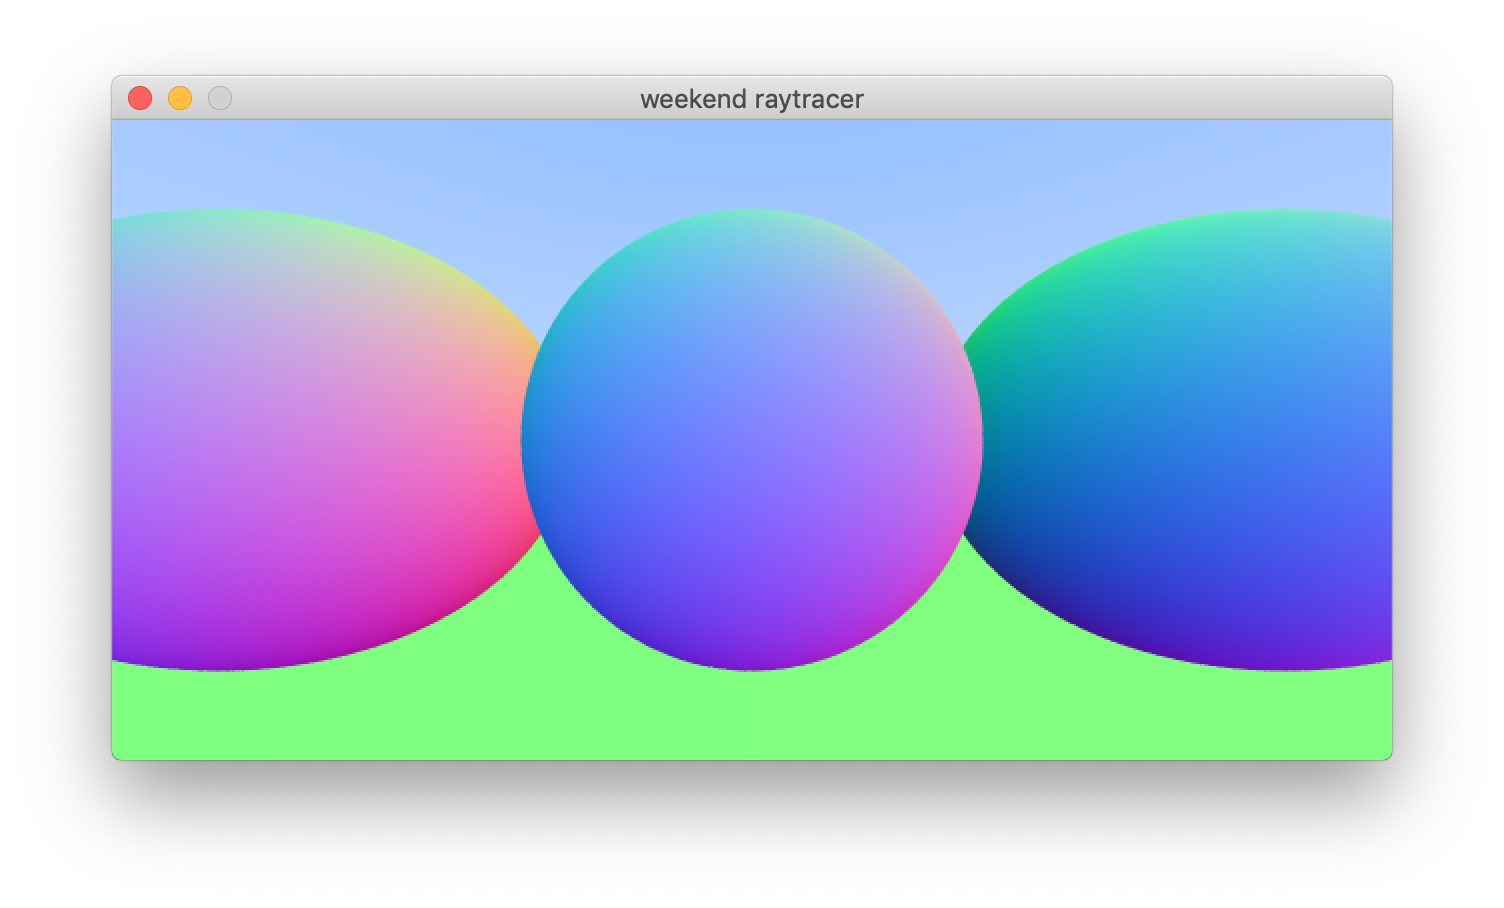
More tests: the scene rendered using the surface normal vector as a color.
Controlling how the ray interacts with the sphere’s surface is implemented using a number of different material objects, which define how the ray scatters from the sphere’s surface. The materials the book implements are lambertian (paper, marble), metal, and dielectric (glass).
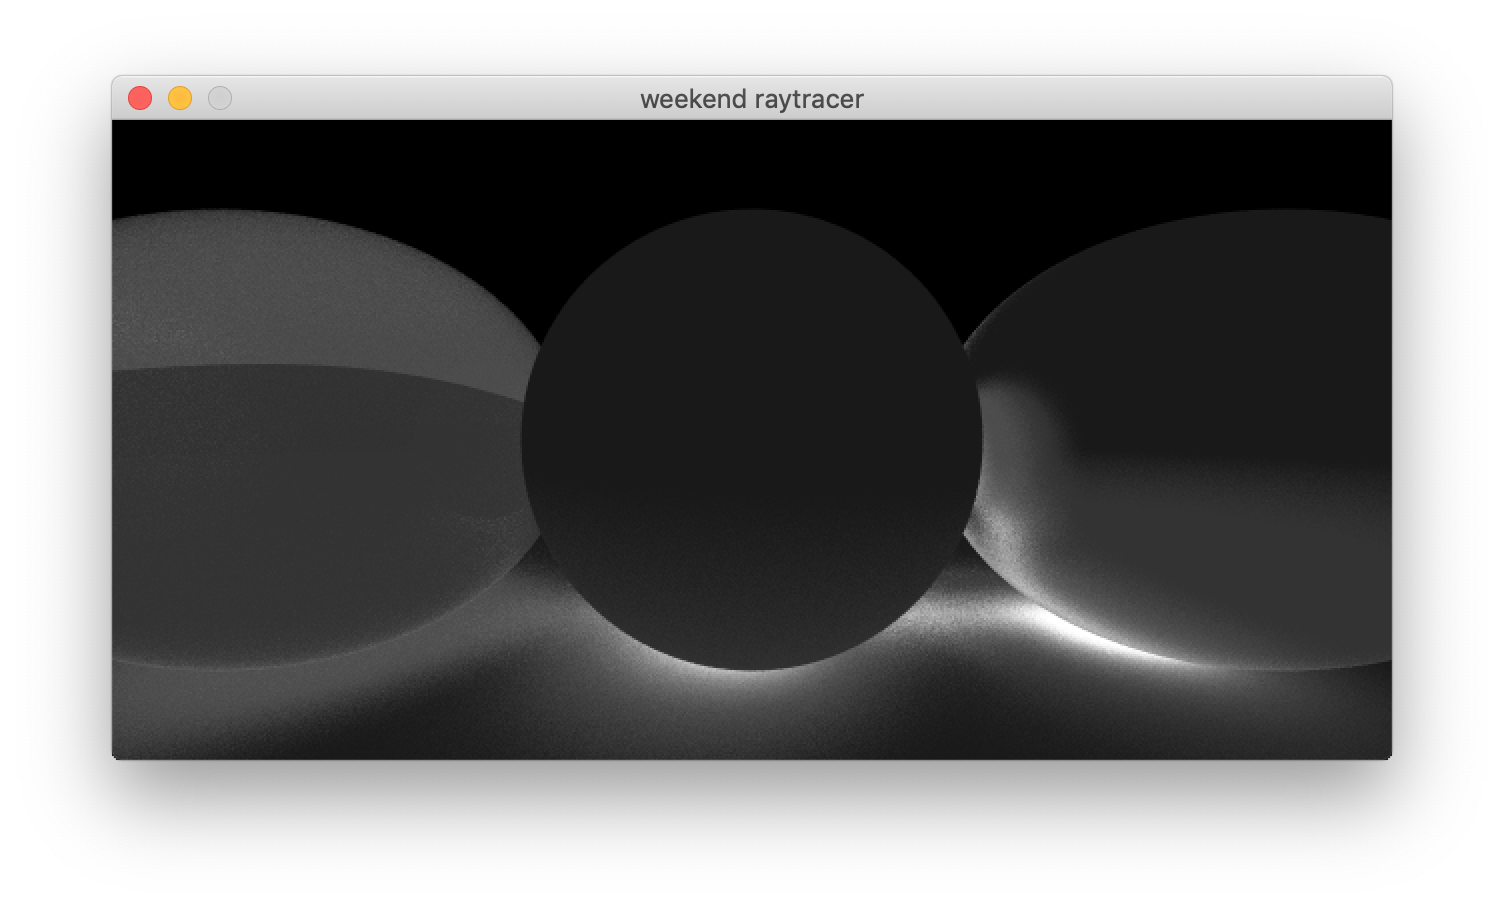
A render showing the number of times a ray has bounced off of a surface for each pixel. The brighter the pixel, the more bounces occurred.
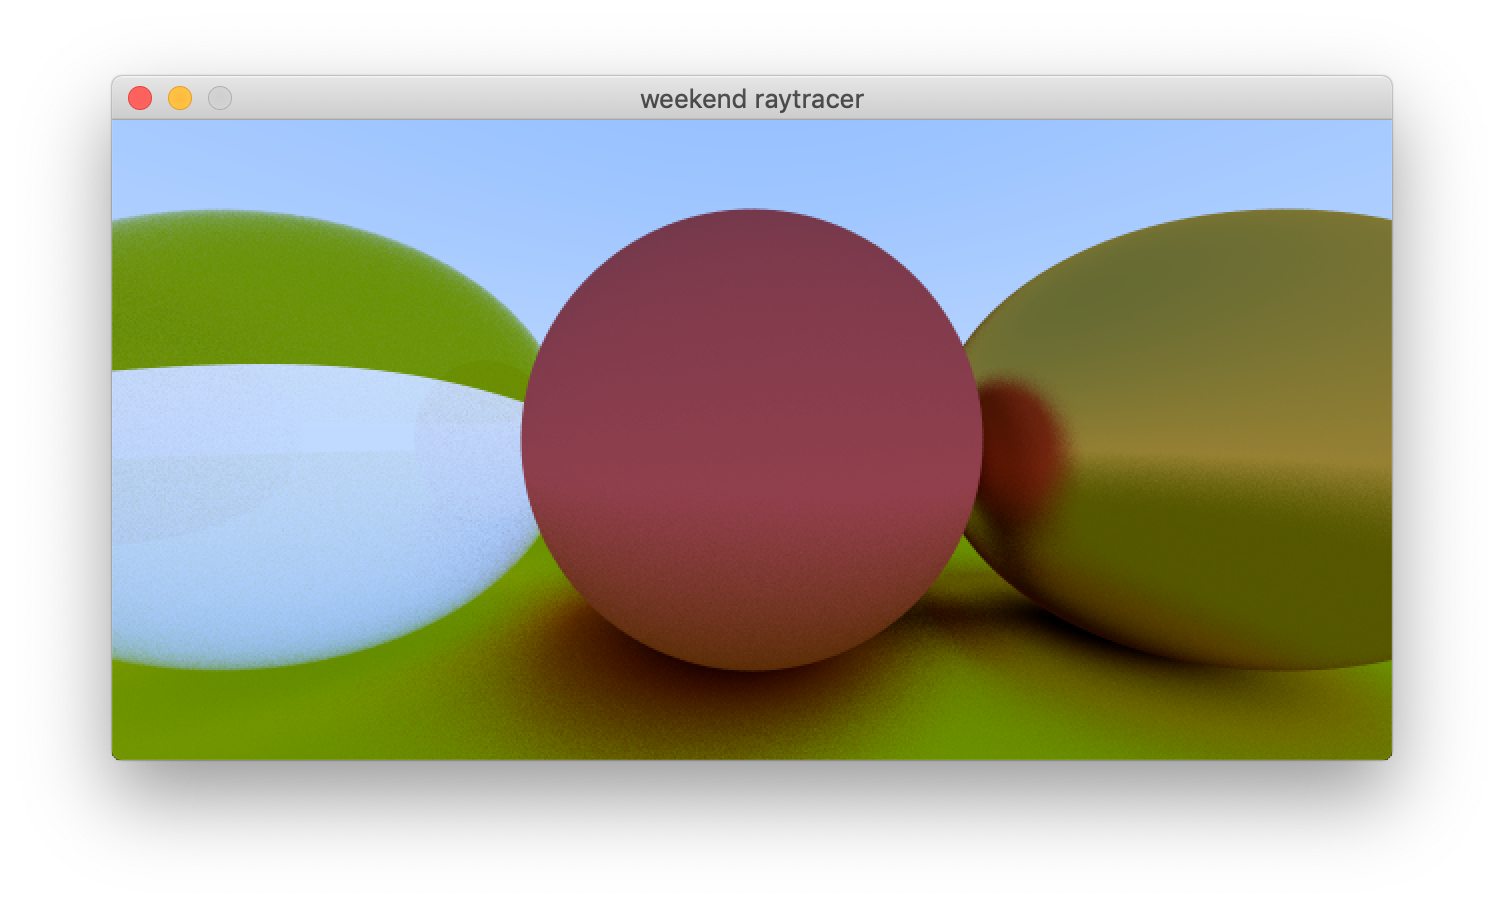
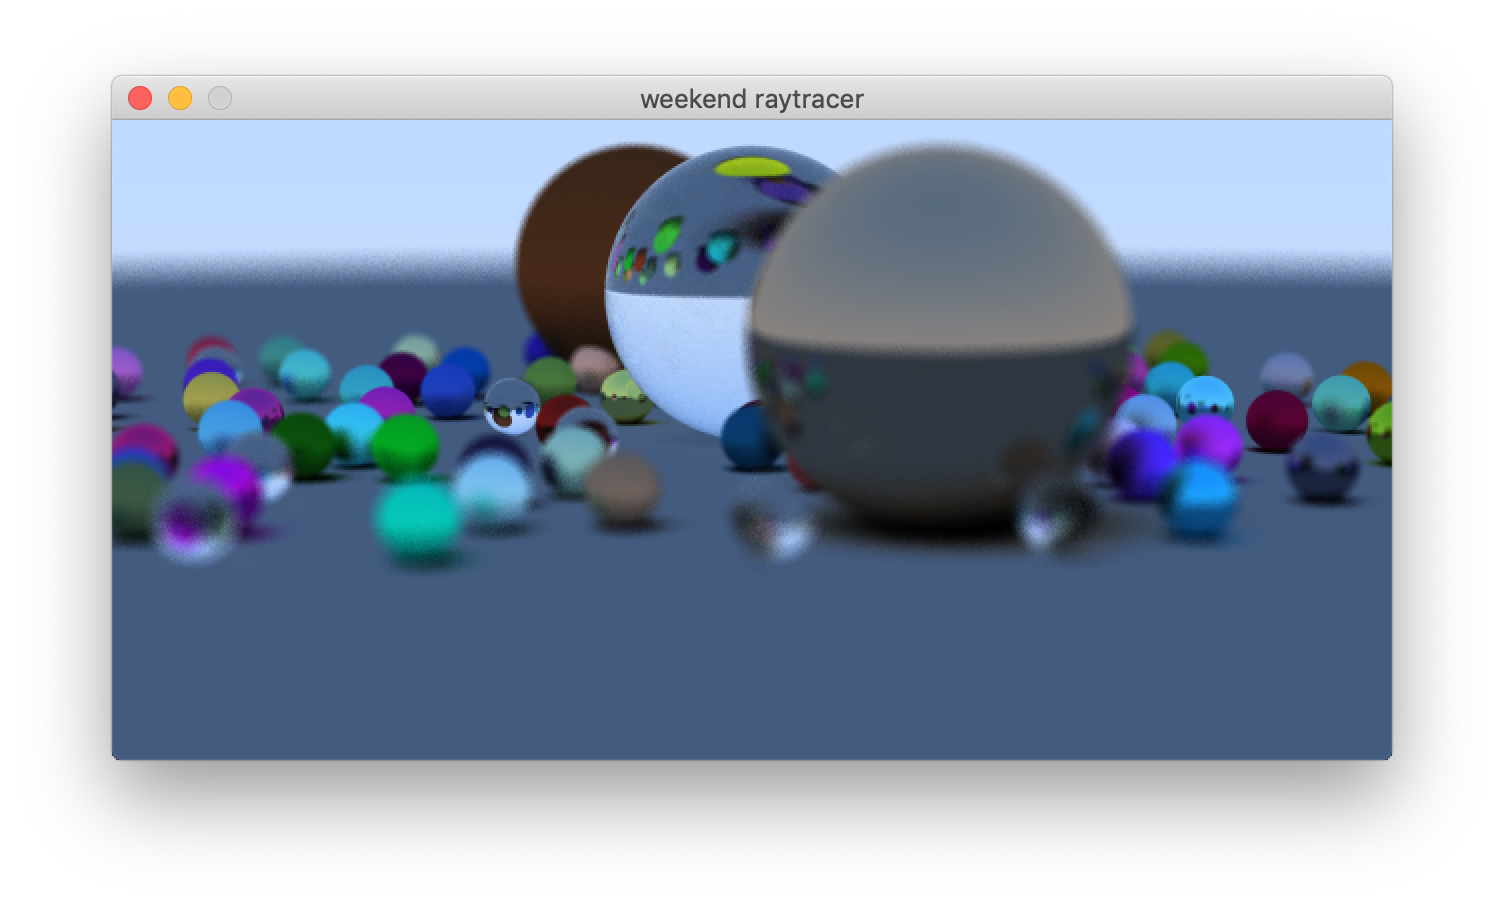
The final image containing a glass, lambertian, and metallic sphere. This is what we’re trying to accomplish in this section.
Rust
Program structure
Ray Tracing in One Weekend adheres to a more old-fashioned style of C++, where relations between types are often modeled using inheritance. I opted to leave polymoprhism on the table and go for a very simple approach.
In Rust, there are no fancy inheritance mechanism so my scene objects, World and Sphere, are just simple structs.
#[derive(Copy, Clone)]
pub struct Sphere {
    pub center: Vec3,
    pub radius: f32,
    pub material: Material,
}

pub struct World {
    spheres: Vec,
}

impl World {
    pub fn new(spheres: Vec) -> World {
        World { spheres }
    }
}
As we can see from the definition of the Sphere, it has one field for a material. The sphere’s material can be any one of the three materials, lambertian, metal, or a dielectric. Once again, this could be a good place to use polymorphism, but I decided to use Rust’s really handy tagged unions instead.
#[derive(Copy, Clone)]
pub struct Lambertian {
    pub albedo: Vec3,
}

#[derive(Copy, Clone)]
pub struct Metal {
    pub albedo: Vec3,
    pub fuzz: f32,
}

#[derive(Copy, Clone)]
pub struct Dielectric {
    pub refraction_index: f32,
}

#[derive(Copy, Clone)]
pub enum Material {
    Dielectric(Dielectric),
    Lambertian(Lambertian),
    Metal(Metal),
}

impl Material {
    pub fn lambertian(albedo: Vec3) -> Material {
        Material::Lambertian(Lambertian { albedo })
    }

    pub fn metal(albedo: Vec3, fuzz: f32) -> Material {
        Material::Metal(Metal { albedo, fuzz })
    }

    pub fn dielectric(refraction_index: f32) -> Material {
        return Material::Dielectric(Dielectric { refraction_index });
    }
}

// Lambertian, Metal, and Dielectric scattering functions omitted for brevity
One could argue that the degree of code reuse is less in this scheme than in the book, since now we have to pattern match on the material union type to call their associated member scatter functions.
let scatter = match hit.material {
    Material::Dielectric(d) => d.scatter(r, hit, rng),
    Material::Lambertian(l) => l.scatter(r, hit, rng),
    Material::Metal(m) => m.scatter(r, hit, rng),
};
But I thought it was an easy tradeoff to make.
Finally, one last missing bit from the ray tracer. Here’s the snippet which calculates whether a given ray intersects a sphere. You can see I created a Hitable trait for my sphere and world structs to implement. In the end, I did not need the trait, because I just called the hit functions directly on the objects. A little bit of premature “architecture” on my part.
impl Hitable for Sphere {
    fn hit(&self, ray: &Ray, t_min: f32, t_max: f32) -> Option {
        let oc = ray.origin - self.center;
        let a = ray.direction.dot(ray.direction);
        let b = oc.dot(ray.direction);
        let c = oc.dot(oc) - self.radius * self.radius;
        let discriminant = b * b - a * c;

        if discriminant > 0.0 {
            let mut temp = (-b - (b * b - a * c).sqrt()) / a;
            if temp < t_max && temp > t_min {
                let hit_point = ray.point_at_parameter(temp);
                return Some(HitRecord {
                    t: temp,
                    p: hit_point,
                    n: (1.0 / self.radius) * (hit_point - self.center),
                    material: &self.material,
                });
            }

            temp = (-b + (b * b - a * c).sqrt()) / a;
            if temp < t_max && temp > t_min {
                let hit_point = ray.point_at_parameter(temp);
                return Some(HitRecord {
                    t: temp,
                    p: hit_point,
                    n: (1.0 / self.radius) * (hit_point - self.center),
                    material: &self.material,
                });
            }
        }
        None
    }
}
Control flow
After spending around a weekend’s worth of time with the project, the thing I actually liked most about Rust was the control flow.
The ability to return values from if expressions and blocks is awesome and I don’t know how I’ve managed to live up until now without it. Instead of conditionally assigning to a bunch of variables it is better to return them from an if expression instead.
// Rust

// Returnign a tuple of values  out of an if expression
let (outward_normal, ni_over_nt, cosine) = if ray.direction.dot(hit.n) > 0.0 {
    (
        -hit.n,
        self.refraction_index,
        self.refraction_index * ray.direction.dot(hit.n) / ray.direction.length(),
    )
} else {
    (
        hit.n,
        1.0 / self.refraction_index,
        -ray.direction.dot(hit.n) / ray.direction.length(),
    )
};
// C++

vec3 outward_normal;
float ni_over_nt;
float cosine;
if (dot(ray.direction(), hit.normal) > 0.0) {
    outward_normal = -hit.normal;
    ni_over_nt = refraction_index;
    cosine = refraction_index * dot(ray.direction(), hit.normal) / ray.direction().length();
} else {
    outward_normal = hit.normal;
    ni_over_nt = 1.0 / refraction_index;
    cosine = -dot(ray.direction(), hit.normal) / ray.direction().length();
}
Returning all the values is more watertight and leaves less room for accidentally leaving something unassigned.
Rust also allows breaking out of loops with a value.
// Rust

pub fn random_in_unit_sphere(rng: &mut ThreadRng) -> Vec3 {
    loop {
        let p = 2.0 * Vec3::new(rng.gen::(), rng.gen::(), rng.gen::())
            - Vec3::new(1.0, 1.0, 1.0);
        if p.squared_length() < 1.0 {
            break p;
        }
    }
}
// C++

vec3 random_in_unit_sphere() {
    vec3 p;
    do {
        p = 2.0 * vec3(drand48(), drand48(), drand48()) - vec3(1, 1, 1);
    } while(p.squared_length() >= 1.0);
    return p;
}
Even though the code looks very similar this time around, the Rust version is just more watertight and wholesome.
Using the Option type was a great way to return the ray-sphere collision information as well as indicate whether a hit occurred, all at once.
// World::hit returns an optional hit result
if let Some(hit) = world.hit(&r, 0.001, std::f32::MAX) {
    let scatter = match hit.material {
        Material::Dielectric(d) => d.scatter(r, hit, rng),
        Material::Lambertian(l) => l.scatter(r, hit, rng),
        Material::Metal(m) => m.scatter(r, hit, rng),
    };
    return scatter.attenuation * color(scatter.ray, world, rng, depth + 1);
} else {
    let unit_direction = r.direction.make_unit_vector();
    let t = 0.5 * (unit_direction.y + 1.0);
    return (1.0 - t) * Vec3::new(1.0, 1.0, 1.0) + t * Vec3::new(0.5, 0.7, 1.0);
}
It’s as if the language was custom-designed to solve many of slightly icky control flow situations you encounter in the book, and in C++ in general. Going back to writing C++ code after this felt like a downgrade.
Zig
Program structure
Even though Zig is trying to be familiar to C programmers, I found that I could structure the program in a practically identical fashion to the Rust version, due to the language having a surprising degree of little similarities with Rust.
The scene works identically to Rust.
pub const Sphere = struct {
    pub center: Vec3f,
    pub radius: f32,
    pub material: Material,
};

pub const World = struct {
    pub spheres: ArrayList(Sphere),

    // This code would be more idiomatic if we passed the allocator by parameter to init(),
    // but I'm just going to use the global debug allocator anyway, so I will skip it for now
    pub fn init() World {
        return World {
            .spheres = ArrayList(Sphere).init(debug.global_allocator)
        };
    }

    pub fn deinit(self: *World) void {
        self.spheres.deinit();
    }

    // implementation omitted
};
I defined the materials in an identical fashion in Zig, since Zig also has very handy tagged unions.
pub const Lambertian = struct {
    pub albedo: Vec3f,

    // scatter function omitted
};

pub const Metal = struct {
    albedo: Vec3f,
    fuzz: f32,

    // ...
};

pub const Dielectric = struct {
    pub refraction_index: f32,

    // ...
};

pub const Material = union(enum) {
    Lambertian: Lambertian,
    Metal: Metal,
    Dielectric: Dielectric,

    pub fn lambertian(albedo: Vec3f) Material {
        return Material{ .Lambertian = Lambertian{ .albedo = albedo } };
    }

    pub fn metal(albedo: Vec3f, fuzz: f32) Material {
        return Material{ .Metal = Metal{ .albedo = albedo, .fuzz = fuzz } };
    }

    pub fn dielectric(refraction_index: f32) Material {
        return Material{ .Dielectric = Dielectric{ .refraction_index = refraction_index } };
    }
};
A small aside: notice how in Zig, structs aren’t given names in their definition, but are instead assigned to named constants. The language allows you to return and assign types, like any other variables, at compile time. In fact, generics in Zig are built on this idea: you pass a function a type, and it returns a new type using the parameter type you specified.
pub fn Vector3(comptime T: type) type {
    return packed struct {
        pub x: T,
        pub y: T,
        pub z: T,

        // implementation omitted
    };
}
This feature has a Lua-like elegance to it. In the Lua language, all objects are essentially tables. The global state is a table, and classes and inheritance mechanisms can be implemented using tables. When you import another module, the module is namespaced inside a table. In Zig, your type declarations, generics, and type name aliasing are based on returning and assigning types. When you import another module, the import returns an anonymous struct with the module content within. Sweet, I love it!
Control flow
Zig also allows you to return values out of if-statements and blocks. Here’s an example where the conditional body contains only one statement.
const scattered_ray = if (rand.float(f32) < reflection_prob)
    Scatter.new(Vec3f.one(), Ray.new(hit.p, ray.direction.reflect(hit.n).makeUnitVector()))
else
    Scatter.new(Vec3f.one(), Ray.new(hit.p, refracted_dir.makeUnitVector()));
If the body or block contains more than one statement, though, you have to break out of the body with the value.
const chunk_size = blk: {
    const num_pixels = window_width * window_height;
    const n = num_pixels / num_threads;
    const rem = num_pixels % num_threads;
    if (rem > 0) {
        break :blk n + 1;
    } else {
        break :blk n;
    }
};
Not quite as effortless and elegant as Rust, but it is sort of consistent with C at least.
There’s no tuples in the language and that means no multiple return values. The dielectric material scattering snippet looks much like the C++ version:
var outward_normal: Vec3f = undefined;
var ni_over_nt: f32 = undefined;
var cosine: f32 = undefined;

if (ray.direction.dot(hit.n) > 0.0) {
    outward_normal = Vec3f.new(-hit.n.x, -hit.n.y, -hit.n.z);
    ni_over_nt = self.refraction_index;
    cosine = self.refraction_index * ray.direction.dot(hit.n) / ray.direction.length();
} else {
    outward_normal = hit.n;
    ni_over_nt = 1.0 / self.refraction_index;
    cosine = -ray.direction.dot(hit.n) / ray.direction.length();
}
The language forces you to declare your variables as undefined explicitly for added safety, however. This should also make undefined variables much easier to find in a codebase.
Living without operator overloading
I’m not sure what I think about the lack of operator overloading. Here’s a small snippet of code I had to write which contained some vector math. While you avoid the problem of operator precedence entirely as well as the possibility of hiding something complicated behind a simple-seeming operator, I’m pretty sure I spent much more time writing this little expression out compared to when I had access to operators.
// Zig

if (discriminant > 0.0) {
    // I stared at this monster for a while to ensure I got it right
    return uv.sub(n.mul(dt)).mul(ni_over_nt).sub(n.mul(math.sqrt(discriminant)));
}

return null;
// Rust

if discriminant > 0.0 {
    let refracted = ni_over_nt * (uv - dt * n) - discriminant.sqrt() * n;
    Some(refracted)
} else {
    None
}
How do C programmers manage?
Loops
There was one surprising facet of the language which made me scratch my head on multiple occasions: loops.
I wanted to loop through a range of numbers using a for-loop, but it looks like you can’t do that. Instead, you can use a while-loop with a continuation expression:
var idx: i32 = start_index;
while (idx < end_index) : (idx += 1) {
    // ...
}
I don’t think I’ve seen such a construct in a language before, and I’m not sure if this is the final way iterating through ranges is going to work. What is the benefit of doing it this way? I would think that a loop which doesn’t leak the idx variable outside the loop body would be better.
To be clear, for loops are in the language, but based on the documentation, I think that they can only be used for iterating over slices.
// From the documentation
const items = []i32 { 4, 5, 3, 4, 0 };
var sum: i32 = 0;

// For loops iterate over slices and arrays.
for (items) |value| {
    sum += value;
}
There’s one more use case where Zig’s loops caused me to scratch my head. Let’s return briefly to our earlier example of the random_in_unit_sphere function. Just like in Rust, it is possible to break out of loops with values. However, Zig doesn’t have the loop construct, and so you have to use a while loop instead. Thus Zig has to assume that the while loop terminates at some point without breaking. This leads to a weird construct: you have to include an else branch after your while loop to ensure that a value is returned even in the case that the loop terminates without hitting the break. I didn’t think of including the else branch in this snippet at first, and it took me an embarassingly long time to figure out why it didn’t compile.
pub fn randomInUnitSphere(r: *Random) Self {
    return while (true) {
        const p = Vec3f.new(r.float(f32), r.float(f32), r.float(f32));
        if (p.lengthSquared() < 1.0) {
            break p;
        }
    } else Vec3f.zero();
}
Somehow, of all the things in the language, I feel like loops shouldn’t be this surprising to work with.
Multithreaded rendering
The scope of Ray Tracing in One Weekend is not large and so far I had only really touched upon the absolute basic features of Rust. I wanted to add simple multithreading to accelerate the rendering and get a small taste of what it is like to get smacked around by the Rust compiler!
The plan was to split the image into multiple blocks and render them all independently, at once. This is not a hard task on paper, since the only shared resource that we are changing is the pixel buffer we are rendering to, and there is no overlap between the image blocks.
 A similar image to the final image in the book. Rendered in about 20 seconds using 128 rays per pixel.
Rust
My Rust journey so far had actually been very smooth, with no major stumbling blocks. But rendering in separate threads turned out to be (unsurprisingly) harder than the way I would do it in C++.
Even though there is no overlap between the image blocks, the compiler doesn’t know that and the code didn’t compile.
It was a bit frustrating to figure out how to accomplish this. Googling yielded a few stack overflow posts with similar questions, and were answered by people basically saying use my crate! I suppose package popularity contests are bound to happen whenever you have a central package registry displaying stats like downloads and dependents.
In the end, the best way to learn was to browse similarly-scoped Rust source code on Github.
I wrapped my objects in atomic reference counters, and wrapped my pixel buffer in a mutex. It might not be the most efficient scheme, but it was a cool to get this non-trivial piece of Rust code to compile and run!
// move our existing world into the reference counter.
let world = Arc::new(world);
let buffer: Arc>> = Arc::new(Mutex::new(vec![0; width * height]));

// ...

let mut tasks = Vec::new();

for ithread in 0..NUM_THREADS {
    // these get moved into the thread
    let buffer_ref = buffer.clone();
    let world_ref = world.clone();

    tasks.push(thread::spawn(move || {
        let mut rng = thread_rng();
        // render into a thread-local block of pixels to minimize the time we need to
        // lock the shared pixel buffer
        let mut local_pixels: Vec = Vec::with_capacity(end_index - start_index);

        // use world_ref to render stuff into local_pixels
        // ...

        // finally, copy the pixels into the shared pixel buffer
        let mut buffer = buffer_ref.lock().unwrap();

        for (pos, pixel) in local_pixels.iter().enumerate() {
            let k = start_index + pos;
            let i = k / width;
            let j = k % width;

            buffer[to_buffer_index(i, j, width, height)] = *pixel;
        }
    }));
}
Zig
Zig doesn’t have any checks for multiple mutable data access, so I was free to do whatever I wanted. The challenge mainly arose from the fact that this aspect of the language is somewhat incomplete. In order to see how to use threads, you have to read the standard library source code directly.
This is the gist of my first attempt.
const ThreadContext = struct {
    thread_index: i32,
    num_pixels: i32,
    chunk_size: i32,
    rng: rand.DefaultPrng,
    surface: *c.SDL_Surface,
    world: *const World,
    camera: *const Camera,
};

fn renderFn(context: ThreadContext) void {
    // rendering happens here
}

pub fn main() !void {
    // ...
    var tasks = ArrayList(*os.Thread).init(std.debug.global_allocator);
    defer tasks.deinit();
    // ...

    {
        var ithread: i32 = 0;
        while (ithread < num_threads) : (ithread += 1) {
            const context = ThreadContext{
                .thread_index = ithread,
                .num_pixels = window_width * window_height,
                .chunk_size = chunk_size,
                .rng = rand.DefaultPrng.init(@intCast(u64, ithread)),
                .surface = surface,
                .world = &world,
                .camera = &camera,
            };
            const thread = try os.spawnThread(context, renderFn);
            try tasks.append(thread);
        }
    }

    // ...
}
We need to pass a thread context object and a function pointer to os.spawnThread. There are no closures in the language, so you have to manage the variable capture yourself, manually.
The problem with this code was that, in Zig, function arguments are implicitly const and therefore I couldn’t use the random number generator contained in the context. I worked around this limitation by casting the random number generator into a non-const pointer using this unholy hack.
var random = blk: {
    const intPtr = @ptrToInt(&context.rng.random);
    break :blk @intToPtr(*rand.Random, intPtr); // cast the const-ness away
};
This really seemed to be working against the language, though, so I popped by the Zig community on Reddit, and was told that a thread context can be passed via a pointer to the thread function. Duh!
And so, the problem was fixed by changing the renderFn signature to contain context: *ThreadContext.
Explicit memory management
There is one more thing worth mentioning. Memory management in Zig is explicit and manual.
var map = std.HashMap(i32, void, hash_i32, eql_i32).init(std.debug.global_allocator);
defer map.deinit();
If any allocations are made, by e.g. a container, you need to free the memory manually. Zig makes that much easier than C with the defer keyword. You should always pair an init call with a deferred deinit call.
The philosophy of Zig is to always pass an allocator to a function if it needs to do allocation. Likewise, if there is an allocation failure, then that function returns an error. Here’s what creating an array of spheres looks like in Rust and Zig, respectively.
// Rust

let mut spheres = vec![
        Sphere::new(
            Vec3::new(0.0, -1000.0, -1.0), 1000.0,
            Material::lambertian(Vec3::new(0.5, 0.5, 0.5)))
];
// Zig

var spheres = ArrayList(Sphere).init(debug.global_allocator);
defer spheres.deinit();

// Append allocates, which can fail, so we have to do error handling.
// Using `try` like this is like using the ? operator in Rust.
try spheres.append(
    Sphere.new(
        Vec3f.new(0.0, -1000.0, -1.0), 1000.0,
        Material.lambertian(Vec3f.new(0.5, 0.5, 0.5))));
Rust is rather implicit in this regard since containers use the crate’s allocator internally. I’m not exactly sure what the custom allocator story in Rust is, but it seems like at this time it’s not possible to customize allocations on a per-container level. I like the fine-grained control of memory management you get with Zig, even if there’s no RAII like in C++ and Rust!
My impressions
So, which language is better? 🙂
I actually liked both languages, but for different reasons.
I was surprised by how frictionless Rust felt, despite what some say – even at this very small scope, I found its functional features to be super useful. The availability of the minifb crate made it actually easier to get started with writing the ray tracer than in Zig. For the most part, there were no stumbling blocks while writing code. I think that if I were to tackle a larger project, especially one with complex resource management, the added safety guarantees of Rust would make programming more smooth and thus more fun as well.
But I also liked Zig’s simplicity. In total, I spent way more time on the Rust part of this post, if you count the time spent reading documentation as well. I read a good chunk of the Programming in Rust book and followed along with a code editor before starting this project. As for Zig, I downloaded the available documentation for offline viewing, and read it through during a 1.5 hour bus ride (and wrote a small vector math library in the process). I feel like mucking around with Zig in smaller scale projects might be more fun in the long run. While I had some issues with the language, it isn’t done yet and it is a project I will definitely be keeping in my radar.
The full Rust and Zig code can be found on Github in case you want to take a look: weekend-raytracer-rust, weekend-raytracer-zig.


